Welcome to the Viking Professional Oven User Manual, your comprehensive guide to understanding and optimizing the performance of your Viking Professional Oven. This manual provides essential safety guidelines, operating instructions, and maintenance tips to ensure optimal performance and longevity of your appliance.
1.1 Overview of the Viking Professional Oven Series
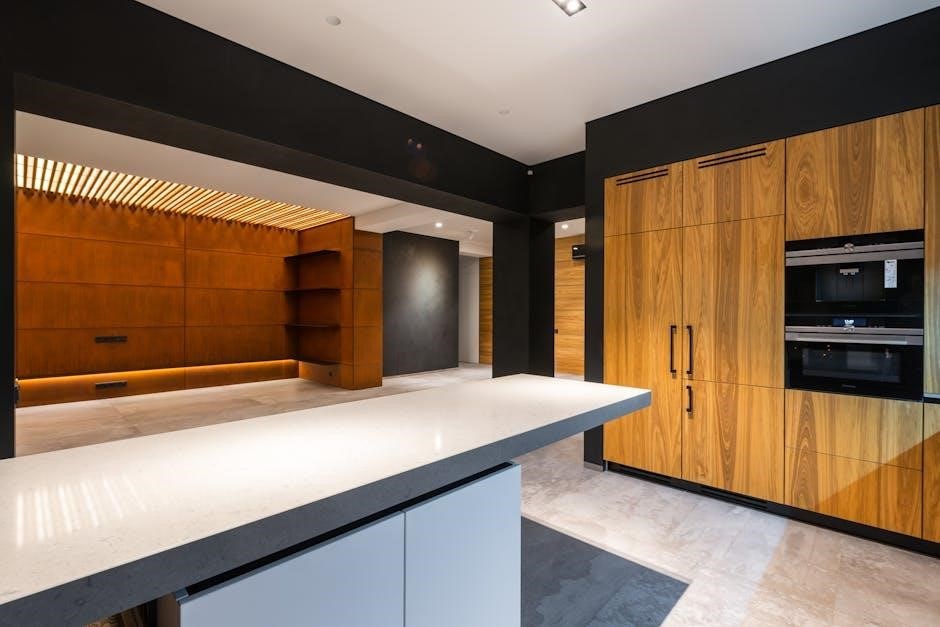
The Viking Professional Oven Series offers a range of high-performance cooking solutions designed for both professional chefs and home cooks. With models like the VEDO205 and VESO1302, these ovens combine advanced features such as convection and conventional cooking modes, moisture and dry heat functions, and precise temperature control. Built for durability and versatility, the series includes single and double ovens, as well as specialized units like warming drawers. Each model is crafted to deliver consistent results, making them a reliable choice for various culinary needs. The series is known for its sleek design and robust construction, ensuring long-term performance and satisfaction.
1.2 Importance of Reading the User Manual
Reading the Viking Professional Oven User Manual is essential for safe and effective operation. It provides detailed instructions for installation, operation, and maintenance, ensuring optimal performance and longevity. The manual highlights safety precautions to prevent accidents and outlines troubleshooting steps for common issues. Understanding the features and functions through the manual helps users maximize the oven’s capabilities, including advanced cooking modes and specialized settings. Adhering to the guidelines ensures compliance with warranty terms and enhances overall satisfaction. Referencing the manual regularly helps users maintain their appliance and address any concerns promptly, ensuring a seamless cooking experience.
Pre-Installation Requirements
Ensure the space meets dimensional requirements and verify electrical compatibility before installing your Viking Professional Oven. Adhere to safety guidelines to prevent hazards and ensure proper operation.
2.1 Space and Electrical Requirements
Ensure your space meets the dimensional requirements for proper installation, with adequate clearance for ventilation and safety. Verify that your electrical system matches the oven’s specifications, typically requiring a dedicated 240V circuit. Check local electrical codes and ensure the wiring matches the oven’s configuration. Measure the installation area to confirm it aligns with the oven’s dimensions. Proper spacing prevents overheating and ensures efficient performance. Failure to meet these requirements may void the warranty or lead to safety hazards. Always refer to the manual for precise measurements and electrical details to guarantee a safe and functional installation.
2.2 Safety Precautions Before Installation
Before installing your Viking Professional Oven, ensure the power supply is turned off at the circuit breaker. Always wear protective gloves and eyewear to prevent injury. Verify that the installation area is clear of flammable materials and well-ventilated. Avoid touching electrical components or sharp edges to prevent harm. Ensure proper grounding of the appliance to meet safety standards. Do not attempt installation without adhering to local building codes. Keep children and pets away from the installation site. Double-check all connections for gas lines (if applicable) to prevent leaks. Use only Viking-approved parts to ensure compatibility and safety. Failure to follow these precautions may result in damage or injury.
Installation Instructions
Follow the step-by-step guide for a secure installation. Ensure proper alignment, level the oven, and connect electrical or gas components as specified. Refer to the wiring diagram provided in the manual for accurate connections. Double-check all fasteners and seals for tightness. Verify power supply matches the oven’s requirements. For gas models, ensure gas lines are properly connected and leak-tested. Allow a qualified technician to handle complex connections. Once installed, test the oven to ensure all functions operate correctly. Always adhere to local building codes and manufacturer guidelines for a safe setup.
3.1 Step-by-Step Installation Guide
Begin by preparing the installation site, ensuring it meets the specified space and electrical requirements. Carefully unpack the oven and inspect for damage. Position the oven in its designated area, ensuring proper alignment and leveling using the provided legs or adjustable feet. Secure the appliance to prevent movement. Connect the electrical or gas components as outlined in the wiring diagram, ensuring all connections are tight and safe. For gas models, install and test the gas line for leaks. Once installed, test all functions to confirm proper operation. Refer to the manual for specific instructions and safety guidelines.
3.2 Wiring Diagram and Electrical Connections
Refer to the wiring diagram located on the oven or in the control panel for specific electrical connections. Ensure the power supply matches the oven’s voltage and amperage requirements. Connect the wires according to the diagram, securing all connections tightly. For gas models, ensure the gas line is properly installed and leak-tested. Ground the appliance to prevent electrical hazards. If unsure, consult a licensed electrician. Always follow safety guidelines and manufacturer instructions for a safe and reliable installation. Proper electrical connections are critical for optimal performance and safety.

Operating the Viking Professional Oven
Operating your Viking Professional Oven involves mastering its advanced features and intuitive control panel. Explore conventional, convection, and precision cooking modes for exceptional results. Understand moist heat, dry heat functions, and warming elements to enhance your culinary experience. Follow guidelines for optimal performance and safety.
4.1 Understanding the Control Panel
The Viking Professional Oven control panel is designed for intuitive operation. It features a combination of buttons, knobs, and an LCD display to navigate cooking modes and settings. Key components include the oven selector to choose between bake, roast, or convection modes, and the thermostat control for precise temperature adjustments. Dual ovens have separate controls for each compartment. The navigation buttons allow easy access to advanced features like moist heat and warming elements. Always refer to the display for real-time feedback and adjustments. Familiarize yourself with the panel to unlock your oven’s full potential and ensure seamless cooking experiences.
4.2 Starting the Oven for the First Time
Before first use, ensure the oven is properly installed and all packaging materials are removed. Set the oven selector to the “bake” position and the thermostat control to 350°F (175°C). Allow the oven to preheat for 30 minutes to remove any manufacturing residues. Open windows for ventilation during this process. Once preheated, turn off the oven and let it cool slightly. This initial heating cycle prepares the oven for cooking. Always refer to the control panel instructions for precise operation. After cooling, wipe down surfaces with a soft cloth before first use to ensure a clean start.
4.3 Conventional and Convection Cooking Modes
Your Viking Professional Oven offers two primary cooking modes: Conventional and Convection. The Conventional mode uses traditional heating elements for consistent cooking, ideal for baking, roasting, and broiling. The Convection mode employs a built-in fan to circulate hot air evenly, reducing cooking time by up to 30% and ensuring uniform results. For convection cooking, reduce the temperature by 25°F (15°C) compared to conventional settings. Both modes are easily selectable via the control panel, allowing you to choose the best option for your recipe. Proper use of these modes enhances cooking efficiency and ensures superior outcomes.
Advanced Features of the Viking Professional Oven
The Viking Professional Oven boasts advanced features like Moist Heat and Dry Heat functions for precise control, along with a Warming Element to keep dishes warm without overcooking.
5.1 Moist Heat and Dry Heat Functions
The Viking Professional Oven features Moist Heat and Dry Heat functions, offering precise control for various cooking techniques. The Moist Heat function is ideal for braising, roasting, or cooking delicate dishes, as it maintains humidity for even cooking. Meanwhile, the Dry Heat function is perfect for traditional baking, roasting, or broiling, ensuring crispy textures and caramelized finishes. These dual functions allow for versatility, catering to both professional chefs and home cooks. By selecting the appropriate mode, users can achieve consistent results, making the Viking Professional Oven a versatile tool for diverse culinary needs.
5.2 Warming Element Operation
The warming element in your Viking Professional Oven allows you to keep cooked dishes at the ideal serving temperature without overcooking. To activate, set the oven selector to the warm mode and adjust the thermostat to your desired temperature (typically between 150°F and 200°F). This feature is perfect for maintaining the quality of roasted meats, casseroles, or baked goods. Always use oven mitts when handling dishes near the warming element, as it may heat up during operation. For optimal performance, ensure the oven is preheated before switching to the warming function. Refer to the control panel for precise settings.
Maintenance and Cleaning
Regular cleaning and maintenance are crucial for optimal performance. Wipe surfaces with mild detergent, avoid abrasive cleaners, and clean racks in soapy water. Schedule annual professional servicing.
6.1 Recommended Cleaning Methods
Regular cleaning is essential to maintain your Viking Professional Oven’s performance. Use a mild detergent and warm water to wipe down exterior surfaces, avoiding abrasive cleaners. For interior cleaning, a mixture of baking soda and water can effectively remove grime. Soak racks in soapy water before scrubbing. Avoid using harsh chemicals or scouring pads, as they may damage finishes. Refer to the Viking Professional Oven User Manual for detailed cleaning instructions tailored to your model. Proper maintenance ensures longevity and optimal cooking results. Always follow safety precautions when cleaning to avoid injury or damage to the appliance.
6.2 Tips for Long-Term Maintenance
For long-term maintenance of your Viking Professional Oven, ensure all components are regularly inspected and serviced. Check oven seals for wear and tear, as damaged seals can reduce efficiency. Clean or replace filters as recommended to maintain proper ventilation. Calibrate temperature settings annually to ensure accuracy. Avoid using abrasive cleaners that might damage surfaces. Schedule professional servicing if unusual issues arise. Store the oven cleaner by covering it when not in use. Refer to the Viking Professional Oven User Manual for model-specific maintenance schedules. Proper care ensures reliability, safety, and optimal performance over years of use.

Troubleshooting Common Issues
Address common issues like error codes, uneven heating, or ignition problems by consulting the troubleshooting guide in your Viking Professional Oven User Manual for quick solutions and fixes.
7.1 Diagnosing Common Problems
Diagnosing common issues with your Viking Professional Oven begins with identifying error codes or unusual behavior. Check for specific error messages on the display, as they often indicate the source of the problem. Common issues include ignition failure, uneven heating, or malfunctioning sensors. Refer to the troubleshooting section of your user manual for a detailed list of error codes and their meanings. Always ensure the oven is installed correctly and meets electrical requirements. If problems persist, consult the manual or contact Viking Range Corporation for professional assistance to resolve the issue efficiently and safely.
7.2 Resetting the Oven and Basic Fixes
To reset your Viking Professional Oven, unplug it from the power source for 30 seconds and plug it back in. This often resolves minor glitches. For basic fixes, ensure the oven is properly installed and meets electrical requirements. Check for loose connections or tripped circuit breakers. Clean the oven regularly to prevent food residue buildup, which can cause performance issues. Refer to the troubleshooting guide for specific error codes and solutions. If problems persist, contact Viking Range Corporation for professional assistance to ensure safety and proper repair.
Warranty Information
The Viking Professional Oven is covered by a one-year full warranty. This warranty covers defective materials or workmanship in normal household use. Contact Viking Range Corporation for support.
8.1 Coverage and Duration
The Viking Professional Oven warranty provides coverage for defective materials or workmanship for a period of one year from the date of original retail purchase. This warranty applies to all components and accessories, ensuring your appliance operates as intended. Coverage includes parts and labor for repairs, offering peace of mind for homeowners. The warranty does not cover damage caused by misuse, neglect, or normal wear and tear. For details on specific terms and exclusions, refer to the warranty section in your user manual or contact Viking Range Corporation directly.
8.2 Contacting Viking Range Corporation for Support
For any inquiries, service needs, or warranty-related questions, contact Viking Range Corporation at 1-888-VIKING1 (845-4641) or visit their official website at vikingrange.com. Their headquarters is located at 111 Front Street, Greenwood, Mississippi, 38930, USA. The customer service team is available to assist with troubleshooting, repair scheduling, and providing resources like user manuals and maintenance tips. Ensure to have your appliance model number and purchase details ready for efficient support. Viking Range Corporation is committed to helping you maintain and enjoy your professional oven for years to come.
